(Originally posted on Tumblr in October, 2023.)
Introduction
(Note: for now I’m not making a bibliography for this article, but if you are interested I’m more than happy to send the sources.)
The two-pieced skirt (liǎng piàn qún) is a type of skirt from the Southern Song Dynasty (1127-1279). It is also known as xuàn qún (literal translation: circle/swirl skirt). As far I know, there are two sets of surviving samples of these skirts, one from the tomb of Ms Huang Sheng (this was her full maiden name – she died at 17, one year after getting married, in 1243) and the other from the tomb of Ms Zhou (also her maiden name – she died possibly at 35 and was buried in 1274). The main stylistic difference between the犀利士5mg se two sets of two-pieced skirts is that those of Ms Zhou had a relatively large difference between the hem and waist measurements (the hem is 15~20cm wider than the waist circumference), whereas those of Miss Huang Sheng had a small difference (approx. 10cm).
Below is a diagram showing the construction. The skirt is composed of one upper piece and one under piece. Each piece consists of two panels which are trapezoids or (roughly) rectangles. For the sake of convenience, we shall call them the centre panel and the side panel. You can see that the centre panels of the two pieces overlap, and the whole thing is fixed onto a waist band. All surviving samples have relatively wide waist bands—about 10-14cm in width. One strip on each side of the waist band is used to tie the skirt.
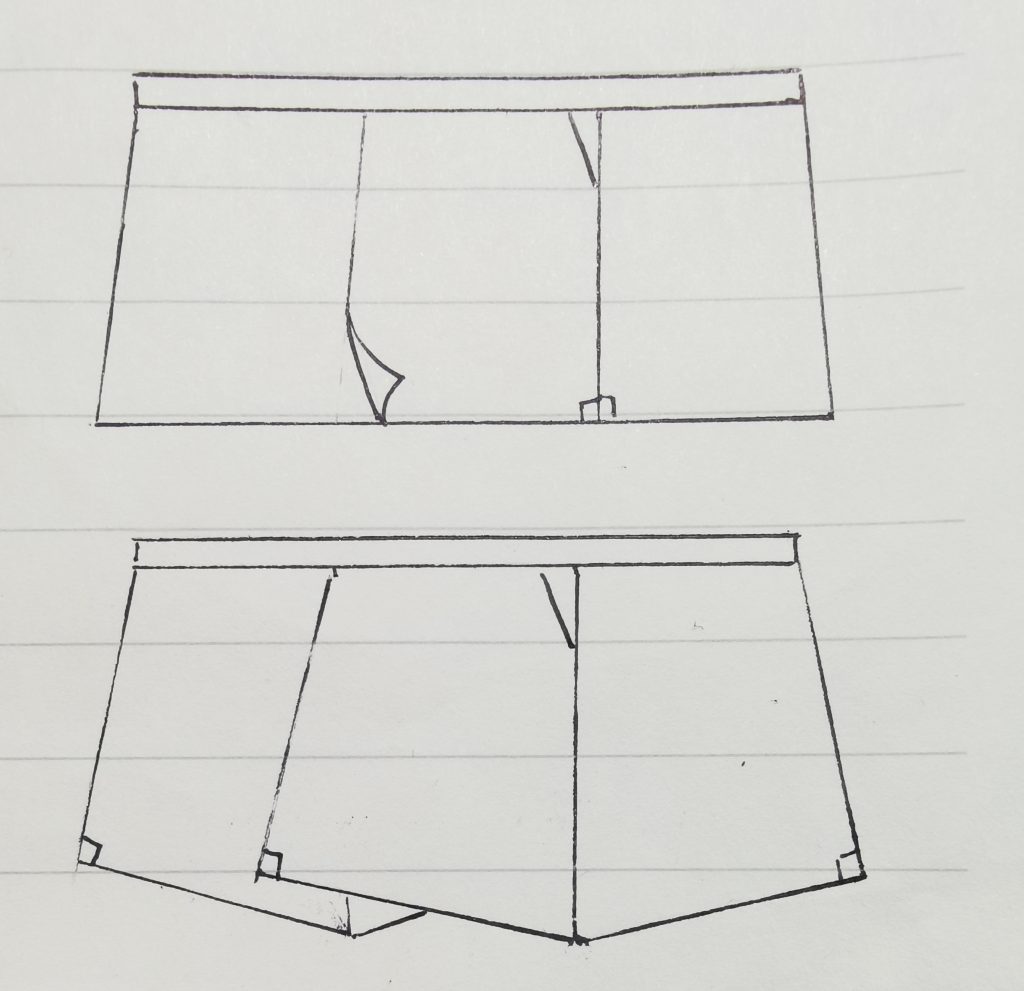
Pattern details
The modern common agreement is that the panels are usually right trapezoids (trapezoids with two right angles). I don’t know whether this is historically accurate, as some people think they were pentagons, but I doubt we can ever find out from what is currently available, just because the fabrics had been damaged and distorted over time. Assuming that they are right trapezoids, there are two different ways to piece the panels: you can sew the edges with two right angles together, or you can sew together the opposite edge with two non-right angles together (see diagram). They yield different results. A skirt made with the first method would have more of an A-line and more flowy. One made with the second method would wrap more snugly around the torso and give an H-shape.
You might have noticed that the centre panel is a bit wider than the side panel. This is because the centre panel would be worn in the back and the side in the front. A good starting point is to make the centre panel 10cm wider, but this of course depends on one’s body shape.
Another modern agreement is that the skirt better compliments a flat body shape with gentle curves (as has been the mainstream high-class aesthetics for the female body for a very, very long time right up to now). The most prominent issue with a difference between waist and hip measurements is that the skirt will bunch up at the lower back. To alleviate this issue, darts are used on the sides. Another way is to wear a petticoat, some underpants, or just something around the waist to enlarge the waist measurement. The skirt is not designed to accommodate a large difference between waist and hip circumferences (>30cm probably, though it starts to get difficult at 25cm).
Applying your measurements
(Numbers, when applicable, are in centimetres.)
You need your waist and hip circumferences. The skirt is usually full length. I like to make it as long as possible without the danger of tripping. It could be made shorter for thicker stiffer fabrics or a more modern look. Keep in mind that the skirt has a very high waist.
The length of the waistband is usually 1.7-1.9*waist circumference. In any case, it cannot be shorter than 1.3*hip circumference or it won’t close properly.
Now that you have the length of the waistband, you can calculate the upper edges of the panels. Let a be the length of the waistband, b the finished upper edge of the side panel. Then the finished upper edge of the centre panel is roughly b+10. Using the information discussed in the previous section, we have an equation: a=2b+b+10. This is your starting point—adjust as needed.
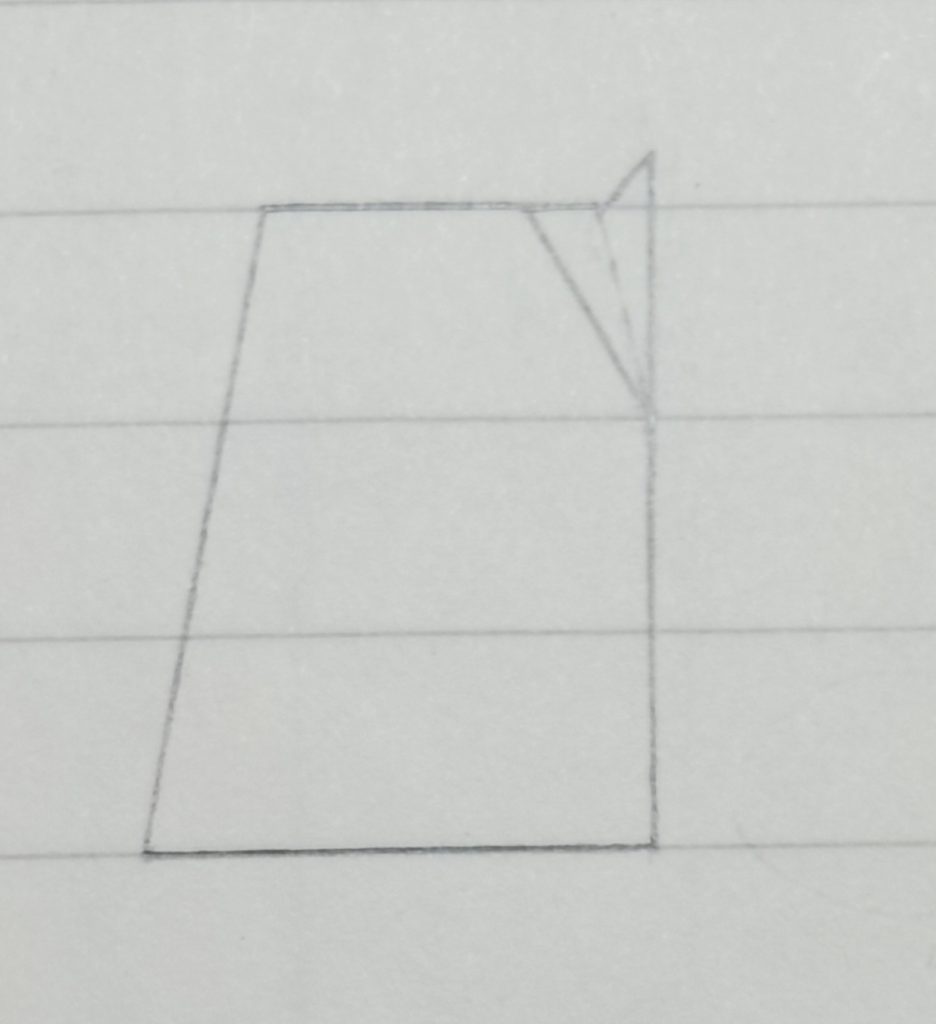
Triangular darts. There are a few ways to make them and this is just one of them. Let c be the width on each side of one dart. c=(hip-waist)/4. This means each dart will eliminate half of the (hip-waist) difference, and there are two darts.
c+b= total width on the upper edge of the panel. The bottom edge (i.e. the hem) of the same panel would be about 5cm wider than the upper edge.
The width of the waistband. If you would like to wear it without folding, 6-8cm is good. If wearing with a fold (which sometimes also helps reducing the bunching at the lower back), make it 10-14cm. Note that you need to cut the waistband doubling the width plus allowance.
The ties are usually 2-3cm wide. As for the length, try start from waist circumference+0.6*skirt length. I like to make it 20cm longer because I like long billowy ribbons. Like the waistband, you cut the ties doubling the width since you will fold it in sewing.
Then you would have something like this:
(measurements used: waist 65, hip 89)
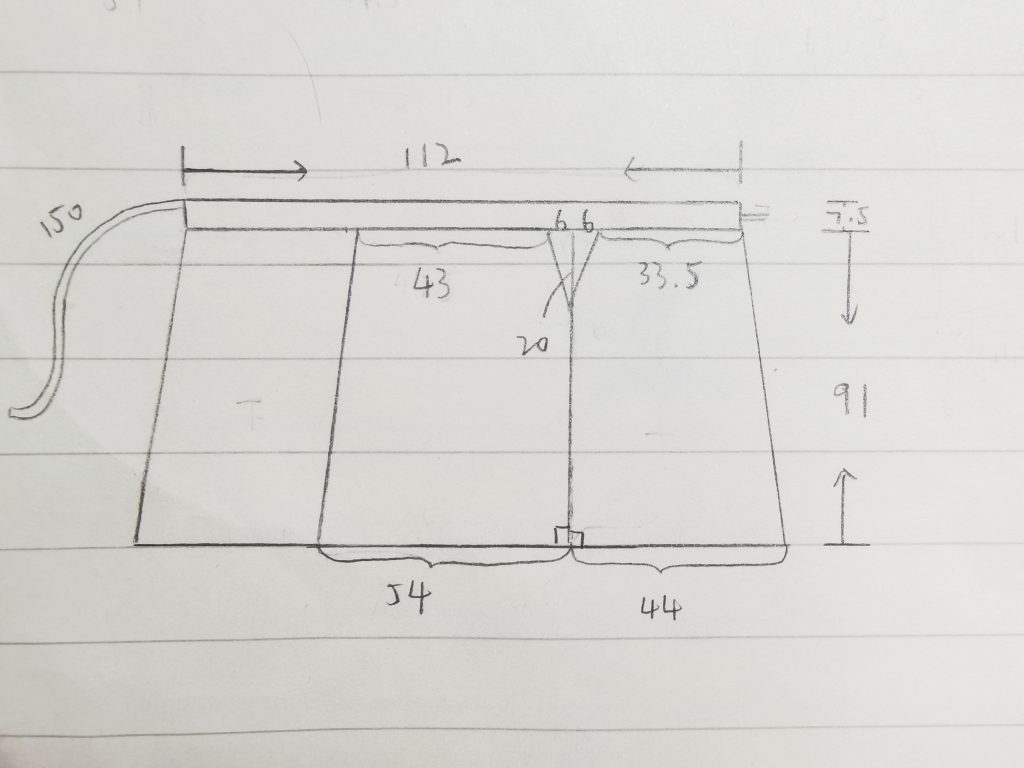
Be careful that you need extra fabric because of the fold created at the dart. (You’d need less fabric if you cut away the excess fabric in the dart.)
Fabric suggestions
This is important. Very very important. Because only the right fabric is worth your time and produces the desired result.
In general, choose something soft, drapey and that conforms to your body. Two or three centimetres of difference in calculation hardly matters when you use a good silk.
Silk: a Chinese specialty called Luo is probably one of the best. Other types of soft drapey silks of medium weights are all fine. I don’t like the right side of silk charmeuse because it reflects the body curves a bit too much.
Viscose: use silk as a guide. I find that twill weave or crepe tends to be more drapey than plain weave.
Cotton/linen/wool: some of these are fine too. If using a thicker wool, only use it for the top piece and use a thin fabric for the under piece of the skirt.
An extra note on cutting out the pieces:
If you are making a skirt with contrasting colours/prints, pay attention to where you cut so that the best part of the pattern of the under piece can actually show through the slit.
Construction
Piece together the side panel and the centre panel, using French seams to make the side seam. Sew all the way from top to bottom.
Sew the dart and press it towards the back. (Alternatively, you can cut away excess fabric, or even make a pocket at the side seam.)
Do Steps 1 and 2 for both the upper and under pieces. Finish the allowances on the sides by folding twice and doing an invisible edge stitch. Leave the hem unfinished.
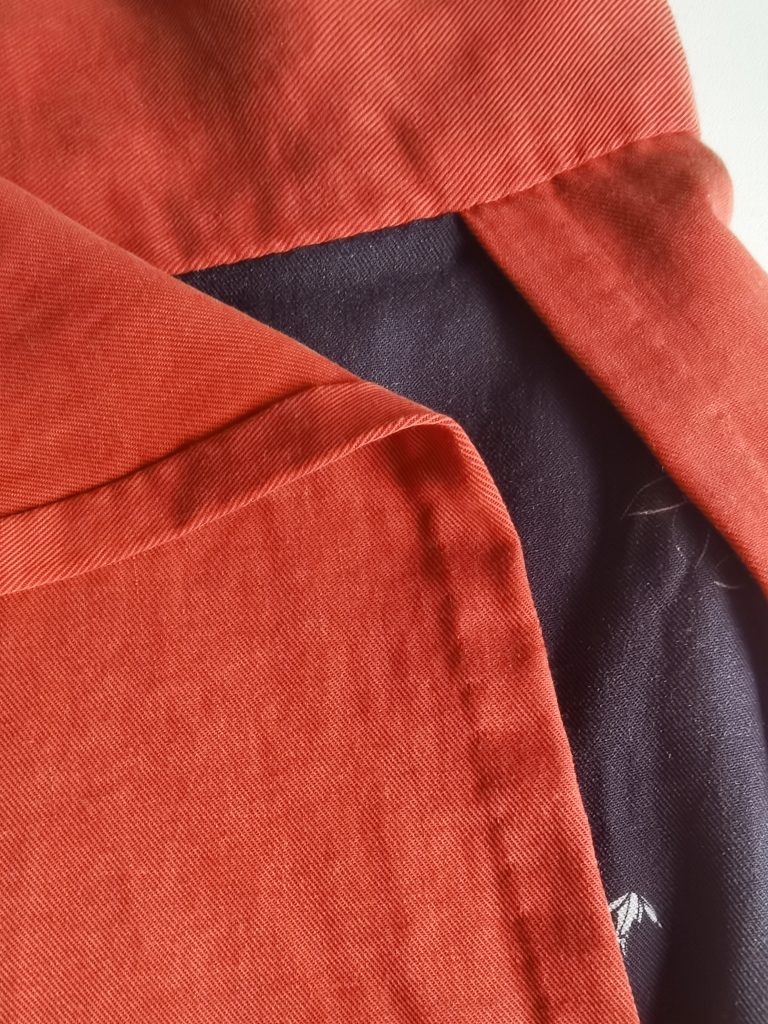
Lay the upper and under pieces together, baste and check fit. Sometimes the centre panel don’t overlap perfectly and that’s fine.
Finish the ties, including the shorter edge not attached to the waistband.
Sew the outer side of the waistband to the skirt panels by laying them right sides together. Press open.
Fold the waistband right sides together and sandwich the tie in between. If wearing the waistband unfolded, you need to attach the tie along the top of the waistband on the under wide and in the middle of the waistband on the upper side (see picture). Sew. Do this for both short edges of the waistband.
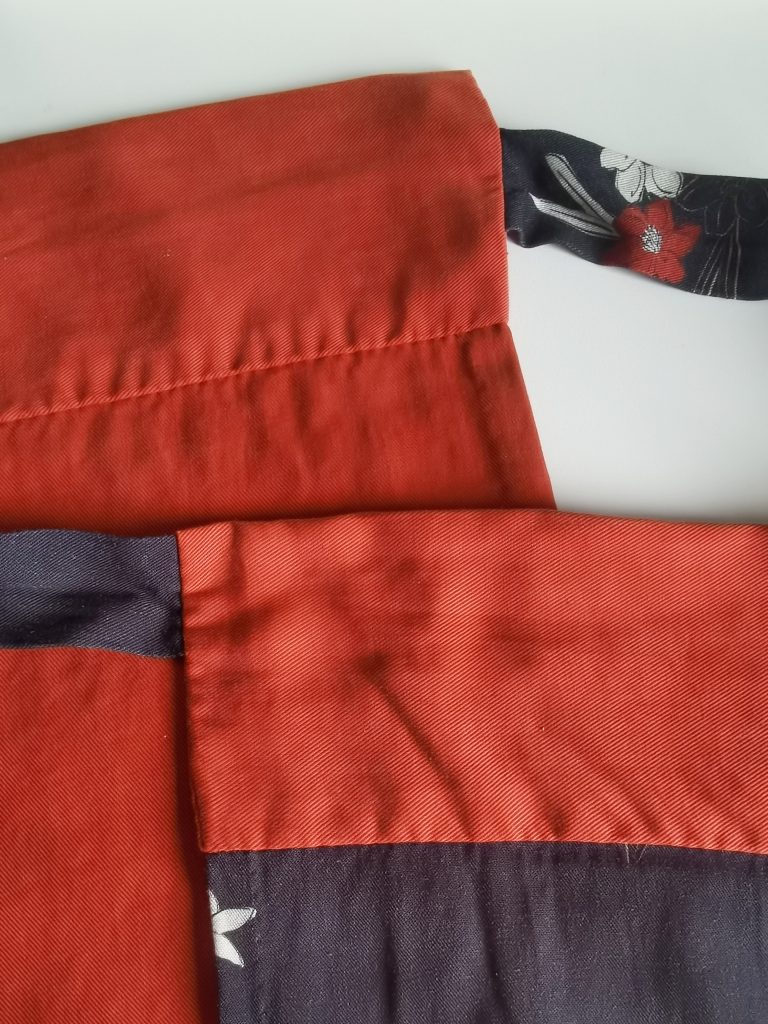
You can interline the waistband if the fabric is too soft. I used a non-adhesive cotton interlining and cut it without allowance and stitched it onto the allowances of the skirt panels. Whatever method suits you should work.
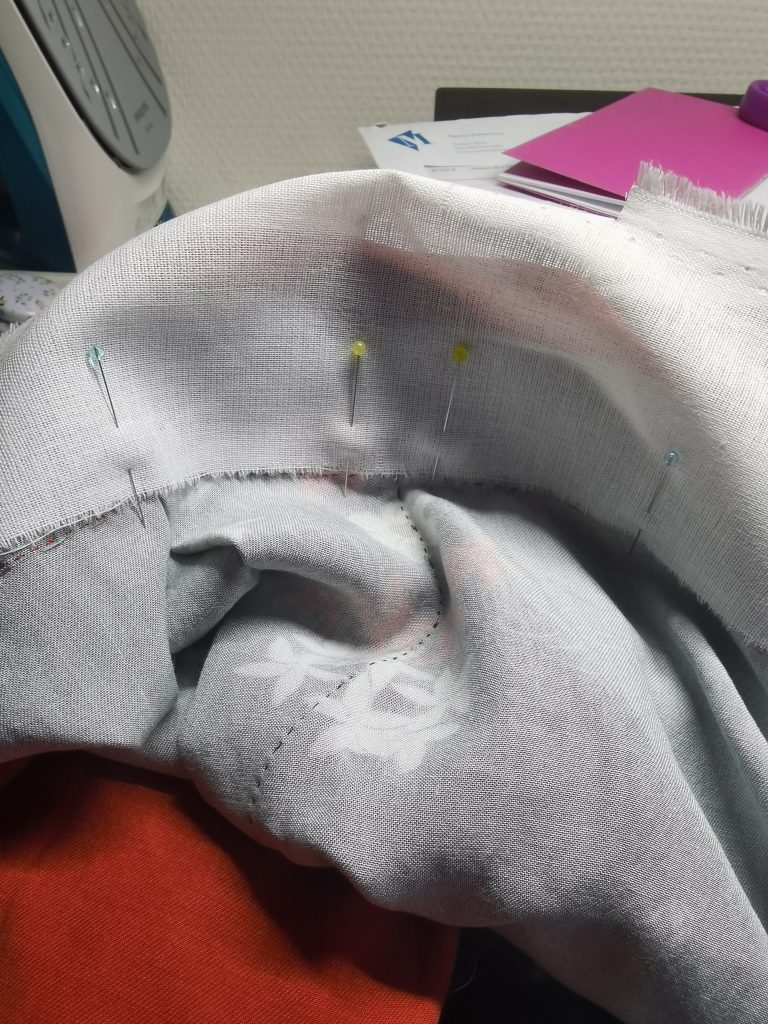
Turn the right side out and finish the inner side of the waistband by folding in the allowance and using an invisible stitch/felting stitch.
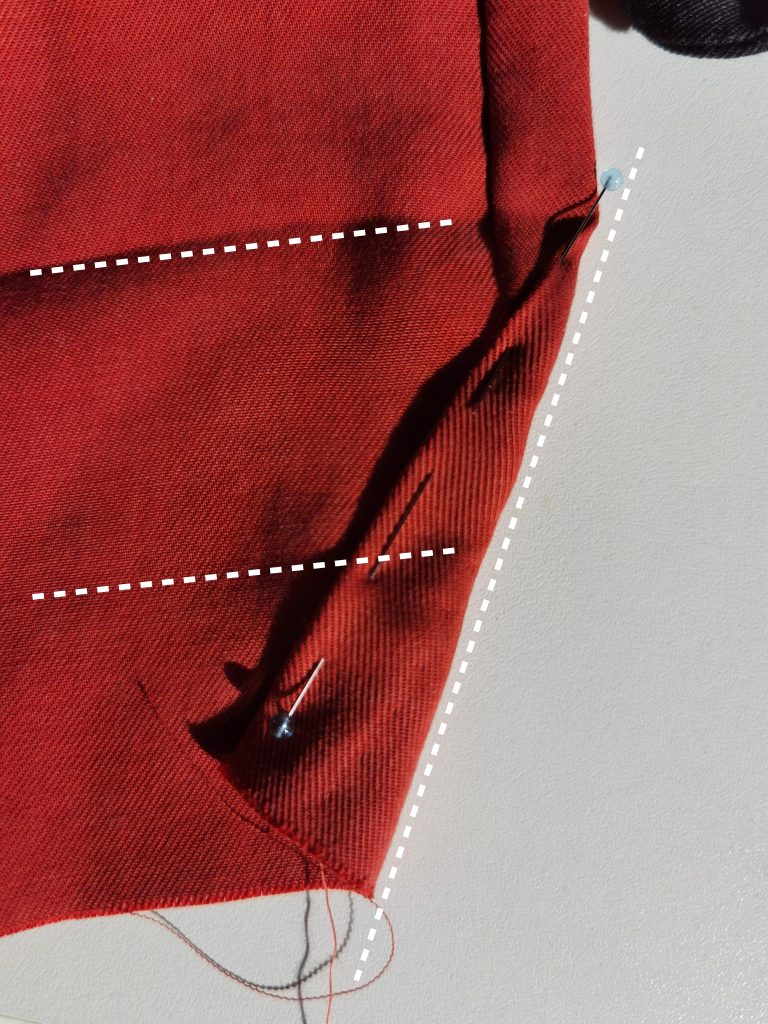
Finish the hem. For the corner, I prefer to do a three-fold corner so that I don’t have to trim away the excess.
Wash and press. Et voilà!


Leave a Reply